

How To Fix A Button On Nintendo Switch
Introduction
This guide was created to assist users in replacing the buttons on their left Nintendo Switch Joy-con. Please note that this guide does not contain steps for the right Joy-Con. The process for the right Joy-con is different and a bit more difficult. The process for replacing the buttons in the left Joy-Con consists of opening the Joy-Con, removing each of the inner pieces, batteries, and motherboard, then locating, removing, and replacing the desired buttons.
-
-
Remove the four screws located on the back casing with a Y00 screwdriver.
-
Insert a plastic opening tool or pick into the side of the Joy-Con without the rail and gently pry downwards to release the back plate.
-
-
-
Open the Joy-Con toward the rail side, like a book.
-
Be careful not to damage the two fragile ribbon cables attaching the rails to the motherboard.
-
-
-
Insert a spudger or plastic opening tool underneath the battery and gently begin prying downward to release the adhesive holding the battery in place.
-
Remove the battery from the inner casing.
-
Be careful not to pull too hard on the battery, as it is connected to the motherboard by a cord and you could risk damaging it.
-
-
-
Gently pull the cord that's connecting the battery to the motherboard up and out of the Joy-Con.
-
-
-
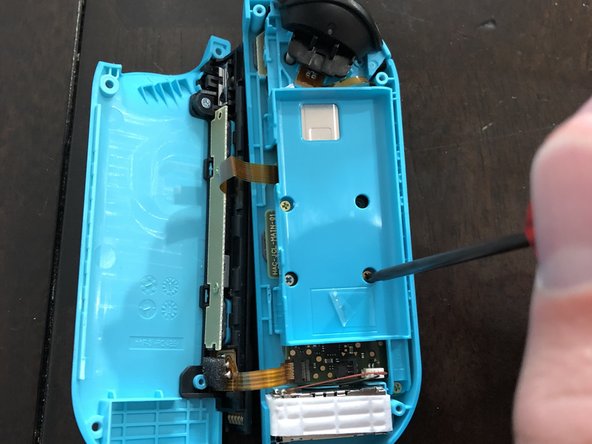
Use a Phillips #2 screwdriver to remove the three screws that are locking the inner casing into place.
-
-
-
Open up the inner casing in the opposite direction you opened up the outer casing.
-
Be careful not to damage the one fragile ribbon cable attaching the inner casing to the motherboard.
-
-
-
Using tweezers, gently lift up on the black or grey clasps holding down each of the 5 ribbon cables connected to the motherboard.
-
Using the tweezers, gently pull each of the ribbon cables out from their connections.
-
-
-
Using a Phillips #2 screwdriver, unscrew both screws connecting the analog stick to the motherboard.
-
-
-
Carefully lift the analog stick up and out from the Joy-Con.
-
-
-
Using a Phillips #2 screwdriver, remove the two screws holding the motherboard in place.
-
-
-
Carefully remove the rumble pack connected to the motherboard by gently lifting it out of its casing.
-
You may need to lift with a little force, as this piece is connected with adhesive.
-
Do not disconnect the cord connecting the rumble pack to the motherboard.
-
Carefully lift both the rumble pack and motherboard out of the outer casing.
-
-
-
Using a Phillips #2 screwdriver, remove the three screws holding the minus button and L button into place.
-
-
-
Locate and remove all of the rubber casings covering the buttons.
-
-
-
Use tweezers to remove all the buttons that you would like to replace.
-
Be careful not to turn the Joy-Con over as the buttons are now loose and could fall out.
-
-
-
Using tweezers, carefully place all your new buttons into the Joy-Con.
-
Make sure each of the notches on the buttons are properly lined up to the notches in the Joy-Con. Failure to do so could lead to non-responsive buttons.
-


Conclusion
To reassemble your device, follow these instructions in reverse order. Make sure when you are screwing the motherboard back into place you do not screw it in too tightly. If the motherboard is too tight to the buttons it could keep the buttons from pushing properly.
Embed this guide
Choose a size and copy the code below to embed this guide as a small widget on your site / forum.
Preview
How To Fix A Button On Nintendo Switch
Source: https://www.ifixit.com/Guide/Left+Joy-Con+Buttons+Replacement/115174
Posted by: nathanprisay.blogspot.com
0 Response to "How To Fix A Button On Nintendo Switch"
Post a Comment