

How To Reduce The File Size Of A Photo
The primary manner to reduce the file size of an image is by increasing the corporeality of compression. In about image editing applications this is done by the selections y'all make in the "Save As" or "Export As" dialog box when saving a PNG, JPG, or GIF. The more compression, the smaller the file will be and the faster it will load on a webpage.
But beginning, you'll need to determine which of the three file formats you want to employ. If your image is a photo with lots of colors or an analogy with gradations and yous want to squeeze the file size down, JPEG volition probably be your all-time choice. If a like photo needs to have lossless pinch or transparent areas, then a PNG-24 volition be required. If you accept a simple graphic with few colors and solid areas, so your best choice will exist a GIF or PNG-eight. We'll accept a wait at how to get the best compression in each of the 3 file types starting with JPEGs. For data about compressing PNGs or GIFs, delight whorl downwardly this folio.
Compressing a JPG
Information technology's easiest to compress a JPG (also called JPEG) considering at that place's only 1 thing to consider: quality. When yous export to JPG from an image editing program, you'll exist prompted to select the quality level you want. You might only see a few choices like: low, medium, high, or maximum. Y'all might be given a number range, for example 0 (lowest quality) to 12 (highest quality). Or you might be asked to select a pct from 0% (lowest quality) to 100% (highest quality). You should always select the lowest quality that is yet suitable for your purpose.
1 strategy for selecting the all-time level is to starting time with a fairly high quality setting and if it looks OK, try reducing the quality a chip. If the reduced level looks good enough, then endeavour another reduction. When you striking a quality level that is unsatisfactory, and then back upwardly to the lowest level that was yet good plenty for your purposes. Ever keep in listen what the purpose of the graphic is. If you are posting a bloom photo to a botanical encyclopedia website, you probably want information technology to exist fairly high quality so pocket-size distinguishing details can be clearly seen. If you are posting a flower photo just to celebrate the arrival of jump, then a much lower quality would probably exist fine. Let's take a slice of a blossom photo and export information technology out at six different quality settings.
100% quality, 103 KB file size
The epitome below was exported at 100% quality. I would rarely ever need this setting.

80% quality, 48 KB file size
The 80% setting is virtually indistinguishable from the 100% setting. Only allow's meet if we can compress it farther.
60% quality, 28 KB file size
Even at 60% almost people wouldn't observe any difference from the 100% setting and since information technology'due south a quarter the size, information technology would load four times every bit fast.

forty% quality, 17 KB file size
For many general uses, even this 40% quality image would exist acceptable. And v times faster to load than the original.

20% quality, 12 KB file size
Getting ugly hither.

0% quality, 7 KB file size
The blockiness of extreme JPG shrink in very obvious.
Sample photo from FCIT's collection of stock plant photos on the ClipPix ETC website.
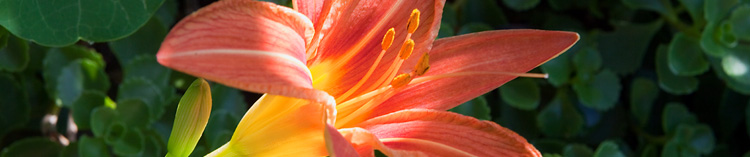
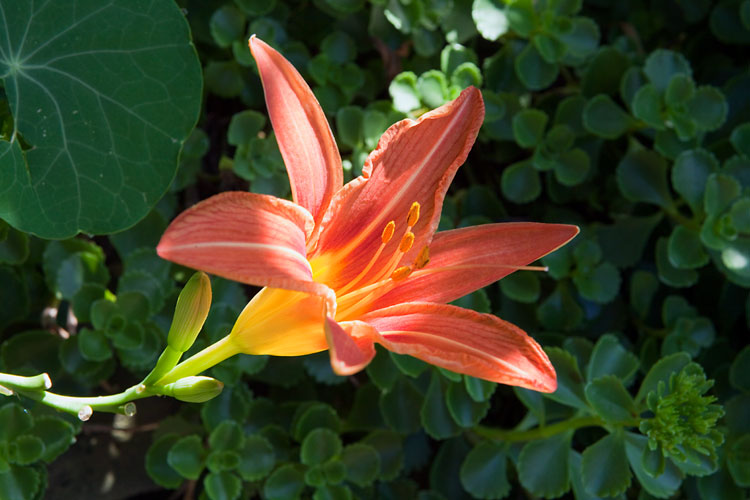
Another way to save file size with JPG is to slightly blur the epitome before you lot compress it. An paradigm with fewer sharp edges and crisp details will shrink much smaller. Perhaps you intend to use a photo as a groundwork image. That's a perfect case for using a blurred photo. You tin can even mistiness just parts of an image and achieve file savings. Beneath is a photo of a twenty-four hours lily with a busy background. The file size is 77 KB when compressed at sixty% quality.
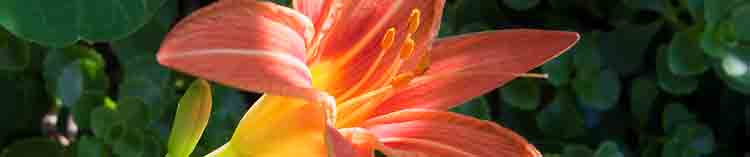
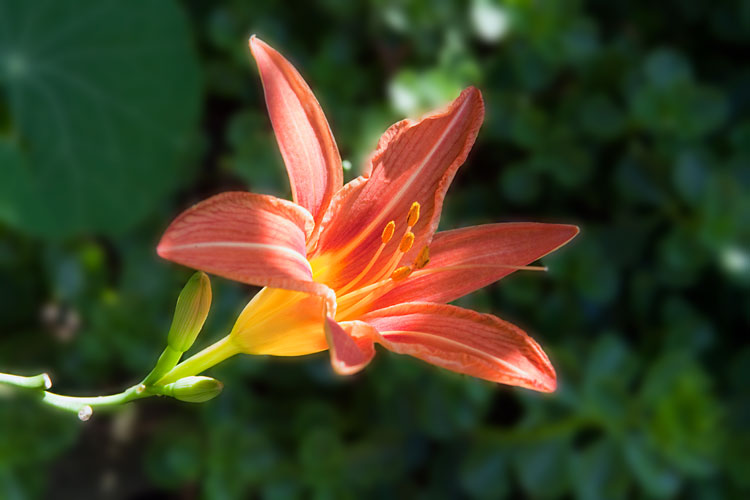
If we take that same image, select the background in an image editing program similar Photoshop, and then mistiness the pick, simply the background volition blur and the flower volition remain sharp. The photograph beneath was exported to JPG at the aforementioned 60% quality setting every bit above and is merely 54 KB—a savings of about 30% of the file size so information technology will load much faster. In this case, we end up with a slightly more artistic photo where the focus remains properly on the flower itself and too reach significant savings in file size. That's a win-win.
Ane last annotation about JPG. Retrieve that this is a lossy format. Every time y'all save a file as a JPG, you lose quality. If y'all think that you'll always desire to use the aforementioned photo again, brand certain you save your original in a format similar TIFF or PSD and then just export the file to JPG. That gives you both the compressed JPG to use on the Web and your original uncompressed file that y'all can use again later. The one thing you definitely don't want to exercise is save your only copy of a file as a compressed JPG, reopen it to edit, and salve it out once more as a JPG. That's similar making photocopies of photocopies. Each time the quality will get worse. It'due south ever better to go back to your original, uncompressed file.
Compressing a GIF
The traditional pick of file blazon for graphics consisting of simple areas and few colors is GIF, although one can now achieve the same results with a PNG-8 (and at a smaller file size).
GIF images are limited to 256 colors, just you can set a lower color depth for substantial savings in file size. For the best results try to get at or just under ane of the following numbers of colors: 256, 128, 64, 32, sixteen, 8, 4, or ii. For example, if your prototype has 33 colors in it you'll be able to shave off a lot of the file size if yous can reduce the palette to 32 colors, but you won't get the same savings moving from 32 down to 31 colors.
Run across "What is bit depth?" for more than information and example images.
When you lot salvage (or consign) as a GIF, offset select the number of colors yous desire in your final image. 2nd, if you lot notice "banding" in areas of gradients, the image probably wasn't a proficient candidate for GIF in the start place simply you can brand the banding less obvious past selecting a dither pattern—normally the "diffusion" pattern volition work all-time. Third, if you have transparent areas of your image, brand sure to select "transparent."
There are a few settings y'all can ignore. Leave "Spider web snap" prepare to zip. This setting is a left-over from the days when most monitors didn't display the millions of colors that they practice today. The "Matte" setting used to be very useful for helping blend the edges of a transparent GIF into the background, simply if that'south a problem for a particular image, y'all should probably switch to PNG anyhow.
And, of course, GIF has been the traditional pick for animated images, although PNG is poised to accept over that area as well.
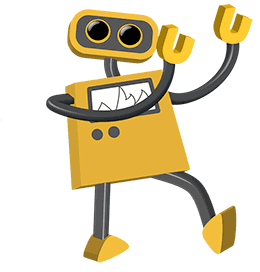
Sample graphic from FCIT'due south collection of robot illustrations on the TIM website.
Compressing a PNG
We finally get to PNG. It's last on the listing not because it's the least of import, but considering it incorporates features of both JPG and GIF. Its popularity has been growing steadily and, by some estimates, is now used on more than websites than either JPG or GIF. It may seem a bit more complex at outset, but if you volition be creating web graphics on a regular footing, information technology's certainly worth mastering.
Commencement, y'all'll need to determine whether to export as PNG-8 or PNG-24. PNG-eight is similar GIF in that it's all-time for graphics with few colors and solid areas like logos. The major difference betwixt PNG-eight and GIF is that the PNG-8 file will generally be smaller than a GIF file. PNG-24 is like to JPG in that it's best for continuous-tone images like photographs or other images with more than 256 colors. The major difference between PNG-24 and JPG is that PNG-24 is lossless so the file size volition be somewhat larger than a JPG, but the quality will exist college.
Exporting as a PNG-8. If y'all export to PNG-8 from a graphics program you lot volition see an interface that is very similar to GIF. Like a GIF, you'll need to select the number of colors (two, 4, 8, 16, 32, 64, 128, or 256), whether to add a dither pattern or not, and whether you need transparency or not. The merely significant difference is that the PNG-8 will be slightly smaller.
Here's a drawing exported equally a 32-color GIF. The file size is 13.6 KB.
Here's the same cartoon exported as a 32-color PNG with exactly the same settings as above. The file size is 10.ii KB. That'south a 25% savings in file size.

Sample graphic from FCIT's collection of tech cartoons on the TIM website.
Exporting as a PNG-24. Since PNG-24 is a lossless format, you really don't take whatsoever options nigh quality when exporting. Different a JPG, no prototype information is discarded. That also ways the file size can be quite large.
Here'south a photo of macaws exported as a PNG-24. Its file size is 400 KB. That'due south pretty large.

Here's the aforementioned photo exported every bit a JPG at the maximum quality (100%) setting. Its file size is 259 KB.
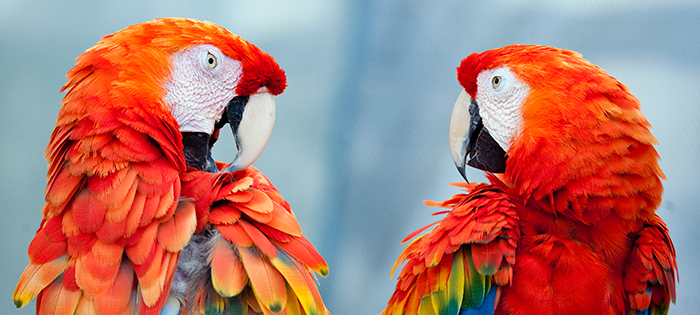
And here's the same photo exported as a JPG at the high quality (threescore%) setting. Its file size is only 69 KB.

Sample photograph from FCIT'due south collection of stockanimal photos on the ClipPix ETC website.
Wow, if the PNG is 5 or 6 times the file size of a serviceable JPG, why would I ever want to use it? Well, there could be multiple reasons for choosing the PNG-24 over a JPG.
ane. If you need transparency in the image, the PNG is necessary because JPGs don't support transparency.
2. If you desire a lossless format, yous'll need the PNG because even at the maximum setting, a JPG loses data and the epitome degrades even if it is non apparent at offset glance.
3. If you absolutely need a clear paradigm with no JPG pinch artifacts, PNG is your choice. A good example is a screenshot that includes lots of small-scale blazon. By its very nature, a JPG is going to "smudge" the type making it slightly harder to read. The PNG volition reproduce the type pixel-past-pixel but as information technology appeared originally on the screen.
Related pages
What is the divergence betwixt bitmap and vector images?
What is bit depth?

How To Reduce The File Size Of A Photo,
Source: https://etc.usf.edu/techease/win/images/how-do-i-reduce-the-file-size-of-an-image/
Posted by: nathanprisay.blogspot.com
0 Response to "How To Reduce The File Size Of A Photo"
Post a Comment